
You know the argument. A farmer swears he gave you eleven litres; your register says ten. There's no way to settle it except memory against memory, and someone walks away unhappy. A printed slip ends that in one move. The moment you save the entry, the farmer holds a parchi in his hand with the litres, the Fat and SNF, the rate and the amount — the same numbers that are now in your book. Nobody has to trust anybody's memory. It also just looks professional. A dairy that hands out a clean printed slip feels organised, and farmers notice.
Milk Sarthi, the free Android app from Apna Infotech, can print one of these slips on every milk entry to a standard 52mm Bluetooth thermal printer. You set it up once and then forget about it — the slip prints on its own each time you save. This guide walks you through the whole thing, start to finish.
What to buy
You want a standard 52mm Bluetooth thermal printer. You'll sometimes see the same device sold as a "58mm printer" — that number is the body width, while 52mm is the actual printing width on the paper. Either label points to the same common, inexpensive handheld printer you'll find at mobile shops and online. You don't need a branded or costly model; the ordinary ones work perfectly.
A few things worth checking before you buy:
- Built-in battery. A rechargeable printer can sit anywhere on your table and isn't chained to a wall socket — much easier at a busy morning point.
- Easy Bluetooth pairing. Pick one that pairs straight from your phone's Bluetooth settings, without needing its own special app.
- Thermal paper rolls. Buy a couple of 52mm thermal paper rolls with it so you always have a spare.
One thing that surprises people: a thermal printer uses no ink. There's no cartridge, no ribbon, no toner. It prints by heating special thermal paper, so the only thing you ever replace is the paper roll. That keeps the running cost tiny.
Step 1 — Charge it and load the paper roll
Straight out of the box, give the printer a full charge — most come nearly empty, and a low battery causes half the "it won't work" complaints later. While it charges, open the lid and drop in a thermal paper roll. Notice which way the paper faces: thermal paper only prints on one side. Load it so the printable side faces the print head, pull a little paper out past the lid, and snap the cover shut. If you're unsure which side is printable, scratch the paper with a fingernail — the side that leaves a dark mark is the one that should face the head.
Step 2 — Pair it with your phone
Turn the printer on — usually a long press on the power button until a light comes on. Now open your phone's Bluetooth settings (not inside any app yet, just the phone's own settings). Make sure Bluetooth is on, let the phone scan, and you'll see the printer appear in the list of available devices, often with a name like "Printer" followed by some numbers. Tap it to pair. If it asks for a PIN, the common ones are 0000 or 1234. Once it shows as paired, you're done with the phone settings — you only ever do this once.
Step 3 — Turn on printing in Milk Sarthi
Now open Milk Sarthi and go to Settings. Find the Thermal printer option and turn it on. The app will show the printers your phone has paired with — pick the one you just added. That's the whole connection. From here on, the app knows which printer to send slips to, and it will print automatically whenever you save an entry.
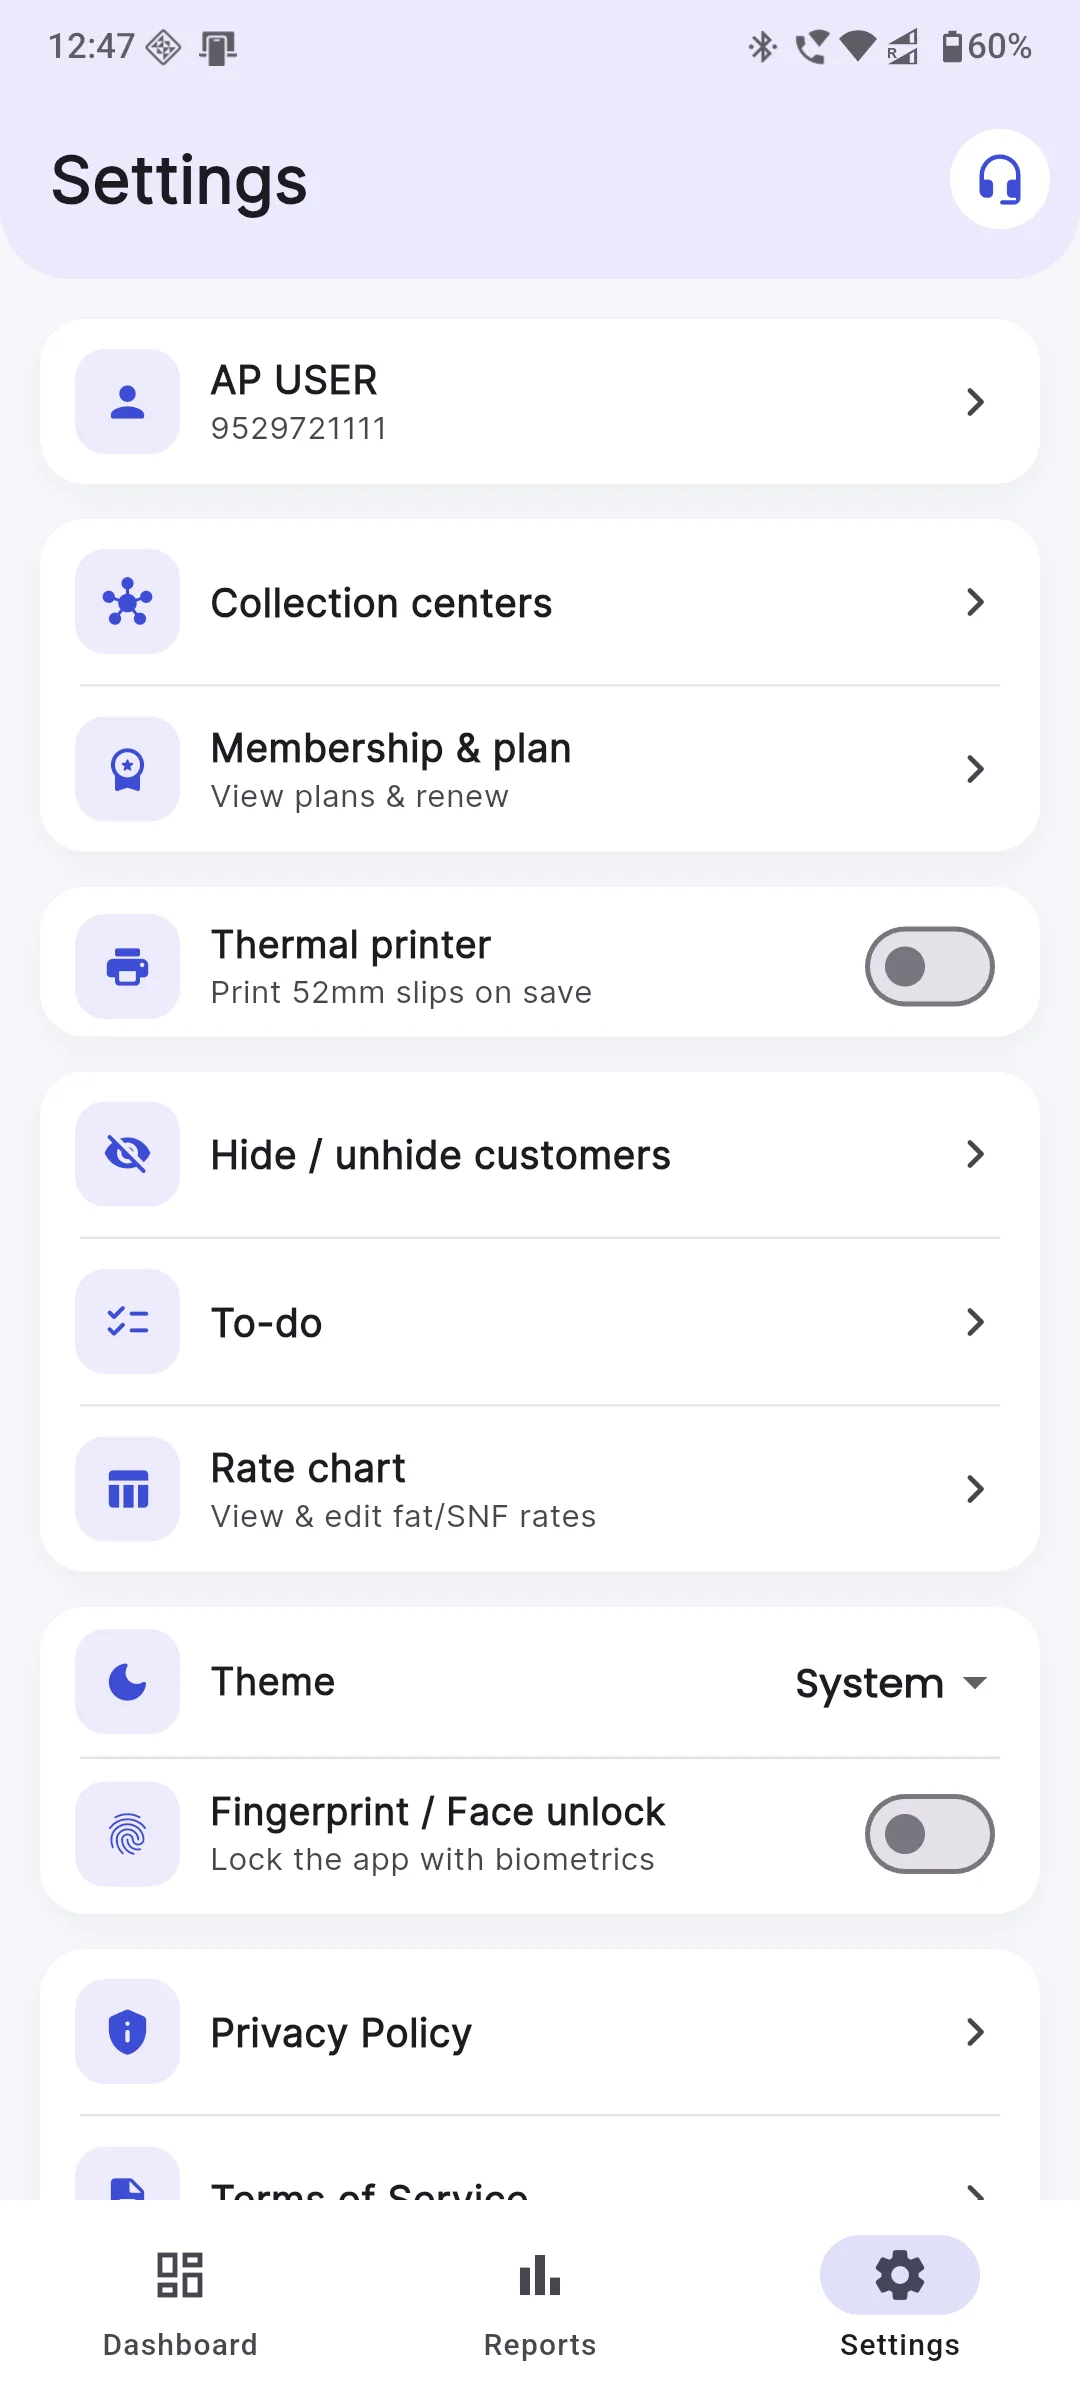
Step 4 — Do a test print
Before the morning rush, run one test. Record a small dummy entry — a party, a litre or two, whatever Fat and SNF — and save it. Within a second or two the printer should whir and push out a slip with the litres, rate and amount printed clearly. If the slip comes out clean and readable, you're ready; delete the dummy entry and you're set. Doing this test on a quiet afternoon, rather than at 5 a.m. with ten farmers waiting, is the difference between calm and chaos.
Troubleshooting
Most problems are small and quick to fix. Run down this short list:
- Printer won't connect. Check that it's switched on and charged first. If it still won't link, go into the phone's Bluetooth settings, remove the printer, and pair it again from scratch — a fresh pair clears most glitches.
- Print is faint or blank. Usually the paper roll is loaded the wrong way round, so the heat is hitting the non-printing side. Flip the roll. If the whole print is weak, the battery is probably low — charge it.
- Nothing prints at all. Open Milk Sarthi's Settings and confirm the Thermal printer option is on and the correct printer is selected. Then check there's actually paper in the printer and the lid is shut properly.
Once printing is running, it pairs beautifully with the rest of your record-keeping. If you're still moving over from a notebook, our guide on going from paper register to app in one day is the natural next step, and when it's time to settle up, see how to close a billing cycle cleanly. You can also see all the features of the app, or just download Milk Sarthi and try it. And because the app works in five Indian languages, the menus and the slip both make sense to whoever is running the point.
Key takeaways
- A 52mm Bluetooth thermal printer (sometimes sold as 58mm-body / 52mm-print) is all you need — cheap and easy to find.
- Thermal printing uses heat, not ink, so you only ever replace the paper roll.
- Charge it, load the paper, pair it once in your phone's Bluetooth settings.
- In Milk Sarthi, turn on Settings → Thermal printer and pick your printer.
- A slip then prints automatically on every entry, ending "how many litres?" arguments.
Give it one calm afternoon of setup, and every morning after that the printer just works quietly in the background — one small slip per entry, and a lot fewer disputes.